Learning to make Bobbin Lace

I thought my quiver of crafting skills was full when my friend Anne invited me to her weaving guild meeting for a demonstration on bobbin lace last September. Sure, I was interested. I wanted to know just the littlest bit about how bobbin lace was made, but I had no need to learn how to make this lace myself. So I attended the meeting, full of confidence that I had learned all the crafts I needed. Silly me.

At the end of the demonstration the kind lace ladies invited anyone who was interested to come up and try making the most basic stitches. I, of course, was interested, and as soon as I started working the stitches I was hooked. I didn’t realize this at the time: I still suffered under the illusion that this was just a thing I was trying for 5 minutes. But then everyone started packing up to go home and the kind lace lady offered to let me take the bobbins and lace pillow home so I could keep working on my sampler. I borrowed a book from my friend, and by the end of the day I had made my first finished piece of bobbin lace!

Then, because I had the materials and tools on-hand and wanted to use them while I was borrowing them, I started another bookmark.

And then I found my own book on beginner lace-making, locally, and for very little money! So I started the next lesson.

I worked on my lace outside as much as possible. The rhythmic clinking of the bobbins was soothing and the sunshine made me happy.

I very quickly needed more bobbins, so I bought a pack. But I decided they were too plain, so I decorated them. I was pleased to find that I had a garden of flowers to enjoy all year long – especially since we were headed into Winter.

By this time I was well and truly hooked. I started going to lace guild meetings each month and I started to get even more interested in bigger projects and more difficult kinds of lace.

October brought my birthday: I started my first big project and bought myself some art-lace books.

And then my progress slowed down to what seemed like a glacial pace. A handkerchief border is not a small project, and since I only had one pillow for lacemaking and one set of bobbins, I couldn’t start or work on anything else. I worked on this one lace project for over 4 months.

I finished the lace in February and sewed in the center handkerchief square in March. I can’t tell you how proud I am of this project!

With my handkerchief finished, I finally painted my remaining bobbins. My garden is now complete!

My next project took me away from my lesson book: I made a dragon! The pattern was designed by Galicia Bee on Etsy, and can be found here. I had a lot of fun making this whimsical pattern. I am realizing through this lace journey just how much joy colour brings me.

At this point I really wanted to venture into other kinds of lace, but I decided to be mature and finish my lessons first (after all, the few remaining techniques are things I need to know before diving into harder laces). My next project taught me how to make square tallies.

You’ll notice my lace pillow has changed! A very kind friend from the lace guild gave me this beautiful pillow stuffed with sea grass!! I was thrilled! So I gave back the borrowed pillow and bobbins and I am finally making lace all with items I own. That may seem silly or small, but it’s a big deal to me. I also made a small family of wooden bead dolls to keep me company while I work on my lace.

Instead of immediately diving into the next lesson, which was leaf-shaped tallies, I skipped ahead to plaits and picots. This lesson went extremely quickly!

And now I have begun my final lesson: leaf tallies. I couldn’t bear to work another project all in white, so I wound up my bobbins in colour and I am off to the races!

I will not say my lace education is complete because I still have so much to learn. But I will say that now that I have the basics down the whole world of bobbin lace is my oyster!

My Year of the Peacock

One of the places we stayed in Portugal had wild peacocks! I was shocked and fascinated and I took lots of pictures.

The peacocks in Lisbon reminded me of my 30th birthday, when I went home to see my family and spent my birthday with wild peacocks!

Those peacocks were equally inspiring. I was just learning how to bead jewelry, and I found a tutorial by Sonysree Creations for a feather necklace. I made the feather in the colours of a peacock feather.

Now my necklace holds twice the memories!

Making a Christmas Dress (for a trip to Portugal)

I’ve had a couple yards of beautiful dark green wool interlock in my stash for several years. I had originally hoped I could make a long dress out of the yardage, but in my heart I knew I didn’t have enough fabric, so I kept stalling the project. The fabric was expensive (for me), but it wasn’t doing me any good sitting in my fabric stash, so this winter I finally decided to use it. My husband and I had been planning a trip to Portugal with friends for Christmas, so I decided to use this lovely fabric to make myself a Christmas dress.

I watched a video a couple of months ago where someone made an Edwardian-ish dress from wool knit. I loved how her dress turned out, so I drew a sketch based on her design and then got working on my pattern.

The bodice and sleeves of my dress are based on the t-shirt pattern from Gertie Sews Vintage Casual. I raised and narrowed the neckline and drafted a rectangle to make a turtleneck, which actually worked pretty well. I made a quick mock-up from some cotton rib-knit in my stash, and I LOVE how this test garment turned out!

How cute is this fabric!?!

I had a VERY limited quantity of wool, so I cut my front and back bodice pieces, did some math to make the tiered skirt work with my fabric, and then drafted and re-drafted my sleeve pattern to fit the remaining fabric. The sleeves were pieced and they ended up a lot less full than I really wanted, but there wasn’t too much I could do about that given my limited quantity of fabric.

Sewing very smooshy, stretchy fabrics like rib-knit or this wool interlock can be tricky on a home sewing machine. I haven’t learned how to use my serger for this purpose, and I don’t have a walking foot for my sewing machine, so I had to get creative on how to sew all these horizontal seams without stretching them out. I found that if I sewed a ribbon into the seams it would minimize stretching, but I still wanted my seams to be able to stretch with the fabric as needed, so I settled on sewing elastic into all the horizontal seams of the garment. This was an ok solution, but the elastic doesn’t feel great against my skin on the seams, so I will continue searching for a better option in future.

I pieced the sleeves and prepped the pockets first. I cut the pockets out of some black cotton jersey in my stash and lined the pocket openings with scraps of green from the dress. Next, I sewed the shoulder seams, then added the turtleneck, then sewed on the sleeves while the top was still flat. I sewed the side and sleeve seams all in one go and then added the sleeve cuffs as the last step before I moved on to the skirt.

These pockets are BIG!

The skirt was easy in theory, but took some wrangling due to the very malleable fabric, the combination of gathering and elastic, and the amount of fabric I was working with. I started by hemming the bottom tier of the skirt and seaming the pockets to the upper tier of the skirt. Next I sewed both skirt tiers into loops and ran gathering stitches on the top edges of each loop. I gathered the bottom tier and sewed it to the top tier, then finally I gathered the top tier and sewed it to the bodice. With this the dress was done!

Except, I kind of hated how it looked on me.

I tried adding a belt, but it still wasn’t great. The waist seam kept slipping down below the belt, and I didn’t love the look of that. The sleeves were also too long. I had hoped they would pool nicely around my wrists, but since the sleeves were much narrower than I had planned they just looked wrinkly and bulky.

I still had a day or two before we left for our trip, so I cut the waist seam apart and tried again. This time I used a 1 3/4″ waist elastic that was black with silver threads on the outside. I laid this over the top of the bodice waist and zig-zagged it on.

I cut the sleeves shorter and added the cuffs back on. Then I gathered the skirt (again) and zig-zagged it to the waist elastic. I cut away any excess seam allowance inside, and the dress was done (again).

The dress was MUCH better this time, so I took it along on my trip and wore it for Christmas Eve dinner and to walk around the city (we were in Sintra, Portugal for Christmas).

Three Words: Pink Corduroy Overalls

I had a pair of green checkered overall shorts that I loved as a child. I wore them constantly, paired with a striped t-shirt. Stripes and checks shouldn’t have worked together, but I loved that outfit, and my confidence made it work. That is the only pair of overalls I remember wearing and loving. As I came into adolescence and my body changed I felt like they didn’t flatter me, and they went out of fashion anyway. And then overalls started coming back over the last couple of years. I bought the Wearing History Homefront Overalls pattern and made a romper 2 years ago (here), but I never ended up wearing it because I overfitted the bodice to the point where it was too tight to wear comfortably. I also felt that the legs of the shorts were too short and too wide for comfort and modesty. It’s too bad, because that romper turned out so cute!

I sewed a lot this summer, but I didn’t blog about it. I was working on a very large project for Halloween. I didn’t make my deadline and the project remains unfinished, but I sewed so hard for so long that I needed over a month of not-sewing to recover. After a few weeks I started to feel the itch to sew something again. I glanced through my stash and 2 yards of pink stretch corduroy caught my eye. I bought the fabric on sale at Hobby Lobby a few years ago (this corduroy is similar) with the idea of making pants. I can generally get a pair of pants out of 2 yards of fabric, so that’s what I bought. I wish I had bought half a yard more since the corduroy has a directional pile, but I wasn’t planning to make super-wide-legged pants or overalls when I bought the fabric. I was able to lay my pattern pieces out so that everything fit and was on-grain except for the front facing, which I had to piece together out of scraps. This felt like a definite sewing Tetris win.

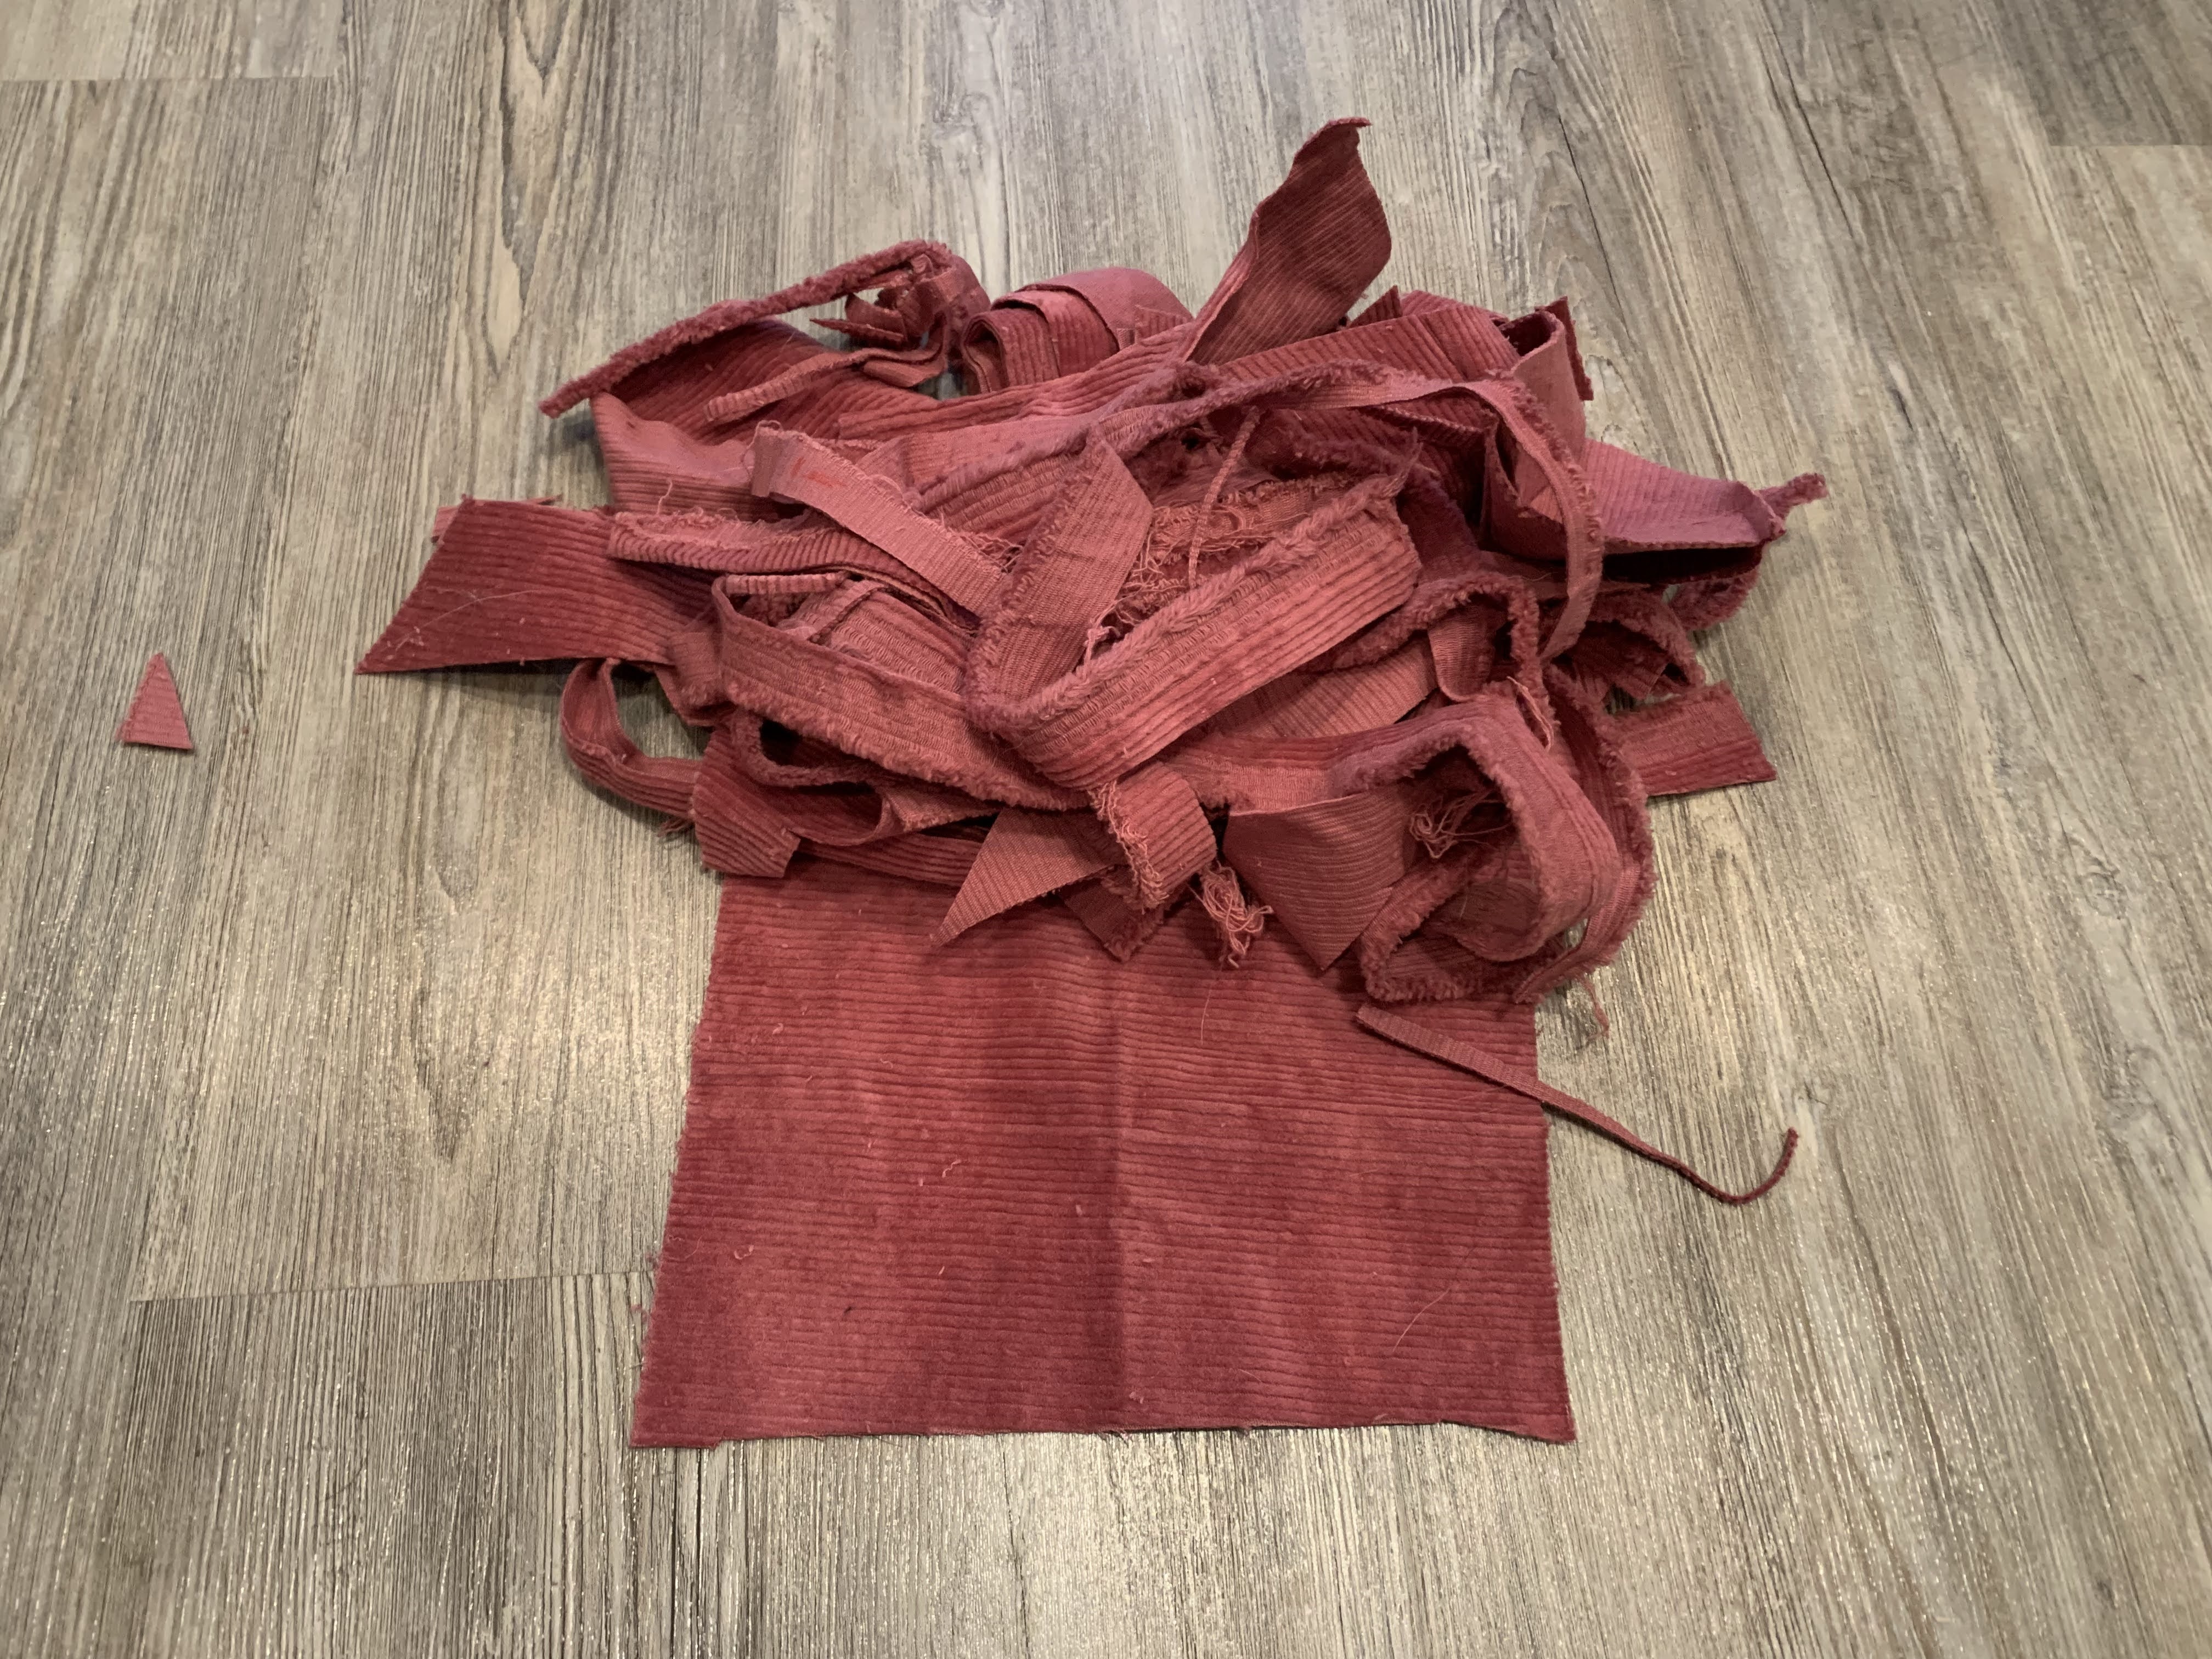
These are all the scraps I had left after cutting the overalls. My biggest scrap is just about big enough for a back pocket.

I didn’t want to make the mistake of over-fitting like I did the first time around, so I took the original pattern pieces that I had traced and cut them out. The only additional modifications I made (I had already graded between sizes in the bust and waist to accommodate my body) were to shorten the legs and add back pockets (one can never have too many pockets). I held the pieces up to my body and did micro-fittings as I went, and I was really surprised that I did not need to make any additional fitting modifications. Because of this they were really quick to sew. I cut the overalls out on Friday, sewed up the bodice darts and the pants on Saturday, and put it all together and did the finishing on Sunday. I did not expect this project to go together so quickly, but it felt like such a huge win!

I took my own advice from the last time I made this pattern and chose easy-to-use closures: a zipper on the side and snaps for the straps. I am so glad I did this. It makes the whole garment so much more wearable!

I was really blown away by how quick these overalls were to make and how well they turned out, especially with no fitting modifications! They have a loose, comfortable fit, but they don’t feel sloppy. I do have a little trouble with thigh chafing because of the dropped crotch. I can’t raise the crotch without losing room in the pants to sit down, so I will probably end up wearing these overalls with shorts underneath, but these are meant to be cold-weather overalls, so an extra layer isn’t a bad thing.

I am definitely interested in making another pair of these in a lighter-weight linen or cotton for summer. I think they would be really comfortable and flattering in a flowy fabric.

Until next time, Happy Christmas and Merry New Year!

Making a Modern Chemise a la Reine

I wrote the majority of this post a year ago when I made this dress. It’s taken me a while to get photos. Please enjoy!

***

I’ve been thinking about making a Chemise a la Reine for a few years now. I got the push I needed to finally start from the recent surge in shirred tops and dresses, and specifically from the video on making shirred dresses by Enchanted Rose Costumes. I haven’t had a shirred dress in probably 10 years, and I wasn’t sure I would like how it looked on me, but I couldn’t get the idea out of my head.

So I made a sketch and raided my stash for materials. I found several yards of a light cotton poplin in a lovely blue and 6 yards of embroidered net lace that I had been dying to use. I realized as I drew that the dress is very similar to a Chemise a la Reine in cut and in use as an easy-to-wear closet staple.

The first step in a project like this is to wind your bobbins with elastic and test the shirring method. My BabyLock Presto II is so well-behaved that she wouldn’t pull the bobbin elastic even the littlest bit tight to shirr the fabric. So I went back to the idea of a Chemise a la Reine and decided to gather just the neckline and waist with elastic.

I measured from my desired neckline to a few inches below the knee (this gave me a few extra inches for hems), and tore two panels at the full width of fabric (which was 45” for my material). I seamed the panels together at the selvedges, then turned the top edge over twice to form a casing for my neckline elastic.

I wanted the neckline of the dress to be higher than my underarm, so I cut out a wedge for the armhole. I used the Adrienne Blouse pattern as a guide for this, but I doubled the width of the wedge while keeping the depth the same. This way I could have gathering under the arm and it would look uniform with the rest of the gathered bodice.

Next I prepared the straps by cutting two strips 4” x 16”, folding the long edges in by half an inch and ironing, then folding each strap in half long-ways and ironing. I did not seam the edges as I planned to insert lace into each strap to form a sleeve with impeccable finishing.

With the pieces of my dress prepared I could now try everything on and fit it to my body. I inserted 1/4” elastic into the front and back neckline channels and pinned the straps onto the dress at the back shoulder. Then I carefully put it on and adjusted the straps, underarm gathering, and elastic until I liked how it looked. I took the dress off, and measured the straps, underarms, and neckline lengths to make sure everything was more or less symmetrical.

I marked the strap lengths, then took the straps off and secured the neckline elastic. Next I used the Adrienne blouse sleeve to cut my lace into a short floaty sleeve. I pleated the lace into the straps, then closed the edges up using a decorative stitch. Then I sewed the lace to the underarm of the dress and topstitched the raw edges down while securing the straps to the dress.

Next I tackled the waist. I had intended to sew the waist elastic directly to the dress, but there was so much fabric that the elastic couldn’t stretch to fit. So instead I sewed on a casing for the elastic, threaded the elastic through, and then top-stitched along the middle of the waist to keep everything in place.

Finally I had come to the hem. I think the hem ended up being the star of the show. I pleated up embroidered net to fit the hem, sewed it on with a straight stitch, then trimmed the dress fabric and folded the net over the cotton and secured this all in place with the same decorative top-stitch I used for the shoulder straps. This means that my hem is completely encased and will not fray. I was finally done.

I won’t pretend this is my favourite dress ever, but it is comfortable and fun to wear, and I always get compliments when I wear it.

So what do you think: is this a modern Chemise a la Reine?

Best Blazer Ever!!

I was supposed to go on a work trip this spring, and I decided I needed a new blazer to really complete my look. The trip ended up being cancelled last minute, but I still finished the blazer (almost) on time.

First, here are my fabrics. This ended up being a real stash-busting project, as everything except the shoulder pads came from my stash. The fabulous fashion fabric and lining (Silk Dupioni! How fancy!) were a gift from my best friend. I decided to use a black velvet for the lapels to give the blazer a smoking jacket vibe. I’m so glad I did this – I think it really highlights the design and elevates the jacket.

I used the Ercilla Suit jacket pattern from Mood Fabrics. I have a long torso for my height, but I found the pattern to be a little long-waisted for me. Other than that, the pattern fit me fabulously and was true to the size chart.

I mocked the jacket up in my lining fabric, a lightweight silk, which is a great way to avoid fabric waste (if it fits), but didn’t give me very helpful fitting information because the silk is such a different fabric and weight that’s the fashion fabric. The center front panel of the lining is done in the collar velvet, which is rather thick and stiff, so I did not use any collar interfacing.

This is all I had left of the fashion fabric (it’s actually a home decorating fabric) after cutting. I did have to piece the left side front, but the piecing is hidden underneath the pocket.

I started by making up the pockets. I attached the pockets to the side fronts, then attached the side fronts to the center fronts. Next I sewed up the back darts, then the back seam, and finally the side seams. I tried the jacket on and was enchanted by the fabric, but also concerned about a few issues.

I didn’t realize how long-waisted the pattern was until I’d already cut out my fashion fabric, and there wasn’t any left to re-cut the side pieces. I was able to move the back darts up by an inch, which helped the fit immensely.

I had cut the back pieces specifically so that the darts would fall along the same vertical line was the fabric print. I didn’t realize that this would leave me with 1/4” of a new column of print on either side of the back seam. I ended up cutting a ribbon of velvet and applying it to the back seam with a small, tight zig-zag stitch.

The last step in constructing the shell was adding the sleeves. These went in without much fuss. I like to sew up my sleeve seams and add gathering to the sleeve heads, then wear the sleeves on the correct arms to make sure they don’t end up backward and on the wrong side of the body.

Both shell and lining were complete. So I pinned them together and sewed around the edges, leaving most of the hem open to facilitate easy turning. I offset the fabrics a little to help the jacket turn nicely: below the button the lining seam allowance was bigger so that the fashion fabric would curl around the edge, and above the button I did the opposite so the collar velvet would curl around the edge for a clean look. I also understitched this seam to hold the fabrics in place. Again, my understitching was toward the lining or toward the fashion fabric according to which direction the fabric would be turning.

I added should pads at this point. Then I turned up the jacket hem and sewed it down with a slip stitch, and measured, cut, and hemmed the sleeves.

I still found the inside of the jacket to move around more than I liked, so I pinned and tacked down the side front seams to keep the heavy velvet in place.

The last step was to cut and sew the buttonhole (by hand, since the button was too large for my buttonhole foot on my machine) and sew on the button. The jacket was finally done.

I LOVE this jacket. It is so bright and beautiful, and I am the only one in the world who has one! The fabric is rather stiff and hot, but I don’t let it bother me. This is the blazer of my dreams. and can we talk about the pockets?!?

I can fit my entire hand in. Scratch that, I tested it with a friend, and at least 3 adult human hands can fit in these pockets!! Props to Mood for giving us these enormously satisfying pockets.

The only question now is what fabric I’m going to make my next one in.

Making a Dress from Pre-shirred Fabric

Last summer shirred dresses took the sewing world by storm. I attempted to shirr my own fabric, but my BabyLock Presto II is so well-behaved that it wouldn’t put enough tension on the elastic thread in the bobbin to shirr the fabric. I made a different dress (which I will post about soon), but it didn’t quite scratch the itch for a shirred dress.

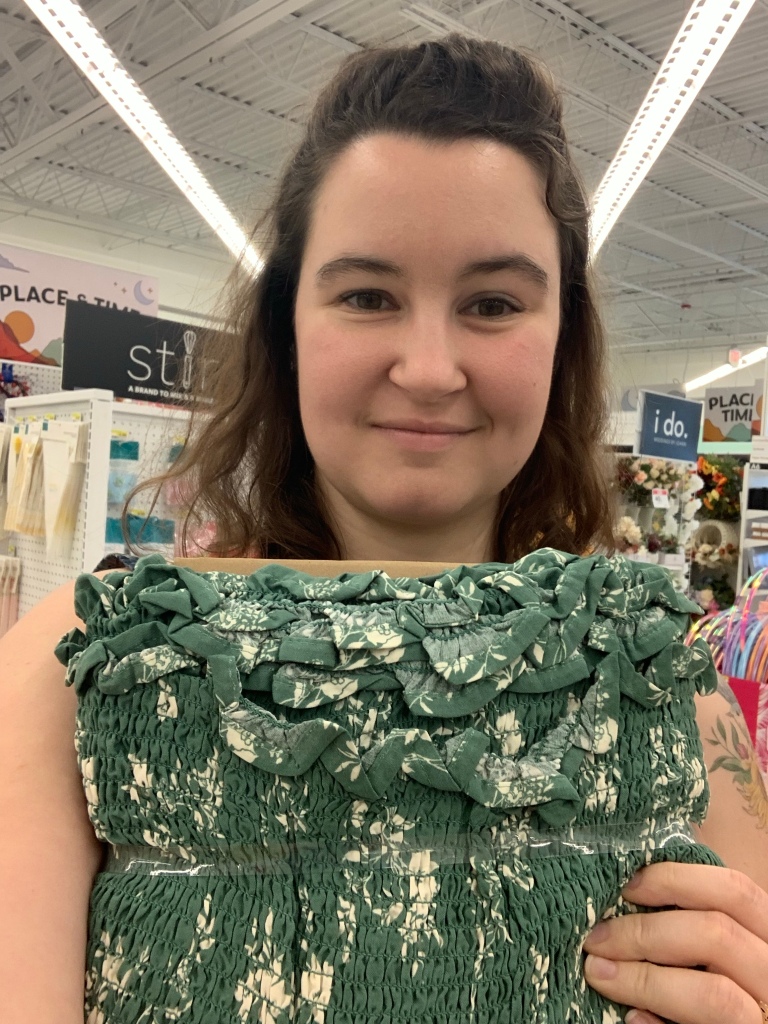
A few weeks ago I was at JoAnn’s and noticed a selection of pre-shirred rayon fabrics. I liked these two the most, and decided to go with the green.

I washed my fabric and let it air dry (Rayon is delicate and I didn’t want to risk damaging my fabric before I even got to sew it up or wear it). I had found a tutorial online that said to cut the fabric to 3” less than the high-bust measurement. I cut my fabric to 32”, but I could have cut it several inches smaller for a snugger fit in the bodice.

I used my new-to-me serger to finish the raw edges, and then sewed the one seam in the dress. I decided to put this seam on the side rather than in the back of the dress. I tried on the dress at this stage and realized it was loose enough that it wouldn’t reliably stay up on its own. Instead of taking out the seam and making the dress smaller (I didn’t want to lose any volume in the skirt) I decided to make some straps.

I hemmed the dress before I made the straps. The full width of the fabric made the dress 7” too long for me. I wanted a deep hem, but not quite that deep, so I cut 3” off, folded and ironed the remaining hem allowance down by 1/2” and then again by 3 1/2” and sewed the hem down.

I wanted the straps to be about an inch wide and 12-15” long, and the strip I had cut off the hem was the perfect size for this. I folded the strip in half and sewed it with a 1/2” seam allowance, then trimmed the seam allowance down, turned it right-side-out, and pressed it with the seam to the center of the strap. Next I cut the one long strap in quarters and hemmed one end of each strap. Finally, I pinned the straps on my dress and sewed them down right on top of the shirring for a nearly invisible finish. The dress was done.

Despite the fact that the fit of the bodice is a little looser than I expected, I really like how this summery dress came out. I do really love how the ties add to the overall look of the dress. This is one instance where fashion and function align.

But I had a problem. There was a small piece of fabric left, and I didn’t want to throw it away or let it sit in my stash as a scrap. It was the full width of the fabric (60”), so I decided to make it into a summer scarf. I removed the shirring stitches on the one end, ironed it, then trimmed it to a more or less rectangular shape. I hemmed the two long edges with a very narrow rolled hem, and pleated some lace scraps to fit the two short ends.

I didn’t know I needed a summer scarf in my life, but I LOVE how this came out!

One more thing: you might have noticed this incredible artwork on my shoulder. I got my first tattoo this past winter, and I couldn’t be more pleased with how it came out.

Making Wilhelmina Woodmouse (a Luna Lapin Friend)

I made another Luna Lapin doll.

She is a rather cute mouse.

I named her Winifred (but she prefers to go by Winnie).

She, of course, needed some clothes.

So I made her a reversible dress (with pockets), a shawl, and a shawl pin.

Clothes for Luna Lapin and Friends

One of the things that makes the Luna Lapin patterns so wonderful is how detail-oriented they are. The doll patterns are adorable, but, as the saying goes, the clothes make the man. And the clothes patterns are even better than the doll patterns, if that is even possible. The reason I say this is that the clothes patterns and instructions have the same level of care and detail put into them as if one were making full-size clothes for a human. This attention to detail really sets the clothes apart. Here are the clothes I have made from these patterns so far:

Dolores’ nightie and robe: The nightgown is Luna’s Nightie from Sewing Luna Lapin’s Friends. The robe was made using the pattern for Luna’s Sailor Collar Dress from Luna Lapin: Making New Friends and omitting the collar. The gown closes with a ribbon tie instead of buttons.

Ginger’s reversible apron: I made Ginger’s Washday Apron as specified in Luna Lapin: Making New Friends, but using two different prints for each side and making sure both sides had a functional pocket.

Anita’s swing dress, pants, and pearl necklace: The dress is Luna’s Tie Shoulder Dress from Sewing Luna Lapin’s Friends. I didn’t have quite enough fabric, so the facings are heavily pieced. I didn’t see a pants pattern that was quite what I was looking for, so I hacked Ramsay’s Cargo Pants from Luna Lapin: Making New Friends to make Anita’s plaid pants. The pearl necklace is made using silk thread. It has knots between each bead and a functional clasp.

My apron: I loved Ginger’s apron so much that I sized it up to fit me! I am 3.5 times as tall as the dolls, so I multiplied the measurements by 3.5 and used the doll pattern as a guide for the angles. I did a quick comparison fitting on myself with the paper pattern, made a few adjustments, then made the apron up in Cotton Duck. I love how it turned out. It is so much fun to wear!!

Luna Lapin has a Sheepy Friend

After making Luna Lapin and Rowan the Redtail Squirrel I was on a roll. It was a case of can’t stop, won’t stop! I had enough felt for one more adorable doll, this time Daisy the Herdwick Sheep.

I cut my sheep out in natural coloured wool with a green floral print for the ears and feet.

The sewing was pretty uneventful. I worked on her slowly, and I brought her to a family gathering at New Years. They all agreed she was already adorable, even before she was put together. I wasn’t sure about the textural bits at her wrists and ankles, and they took a decent amount of time to do, but in the end I decided they are pretty charming.

Once all the bits and pieces were done I added the facial details and then assembled my sheep.

She turned out like this. I am smitten!! I asked my sisters for naming advice again and we decided on Anita Woolsworth. Stay tuned for some cute doll clothes!